
Makeup Artist: Amber Trimble
Tuesday, October 30, 2012
Saturday, July 7, 2012
Thursday, July 5, 2012
Monday, July 2, 2012
Sunday, July 1, 2012
Monday, June 25, 2012
Sunday, June 24, 2012
Bree Cherise and makeup by Faces by LaRae
Some shots from the shoot with model Bree and makeup artist LaRae, assistant was Carol Bares.
Makeup by Faces by LaRae
Model Bree
Beauty dish camera left, soft box on background, speed light camera right.
Beauty dish above center, silver reflector below camera center, bare bulb behind.
Tuesday, June 19, 2012
how to retouch skin using frequency separation

We're going to start of with a shot with some blemishes that we want to remove.
 Our first step is to duplicate the background layer twice, for ease of identification an organization put the duplicate layers in a group and rename them. I've renamed the bottom duplicate layer color and the top one texture as well as renaming the group to retouch. This allows us to easily identify the layers we are working on and know what they're doing. At this point, hide the texture layer and select the color layer. Apply a slight blur to the color layer using gaussian blur, just enough to blur the fine details but don't go overboard with it. By hiding the texture layer we can see the effect of the blur on the color layer.
Moving on, we want to unhide and select the texture layer. Go to image - apply image. Your source is the file that you're working on. Under layer select 'color', and channel should be set to RGB.
If you're working with a 16 bit file use the following settings:
Invert: Unchecked
Blending: Subtract
Opacity: 100%
Scale: 1
Offset: 128
If you're working with a 8 bit file use the following settings:
Invert: Checked
Blending: Add
Opacity: 100%
Scale: 0
Offset: 0
Preserve transparency and mask should both be unchecked.

You should have a mid-grey layer with a faint outline of the image. You now want to changing the layer blending option to 'linear light' What this does in effect is create a layer that acts much like the unsharp mask filter, but since we've created two separate layers we can work on the color and texture of the image independently.
To do this, start by again hiding the texture layer and selecting the color layer. I find it easier to start by retouching the color layer without texture so we can see just the effects of the color. Smooth it out using the clone stamp tool or your other favorite method, we want a layer that has even and smooth skin texture with soft gradations in the shadows and highlights. Make sure if using the clone tool that your source is set to current layer. This is why we use a small blur initially, so as to preserve some of the fine edges such as boundaries between the lips and skin or eyes. Once we are satisfied with the color we can unhide and select the texture layer and clean up the texture using the same technique.
Our final image should have a smooth skin but still retain the texture of skin. It's important for the realism of the portrait that there is still texture such as pores, a blurred skin looks fake and should never be acceptable. Using the frequency separation technique outlined here can provide high quality results and can be done quickly. Total time for me on this sample was around 6-7 minutes.
Compare the original photo above to the final retouched version by clicking on either for a larger image.

Sunday, April 22, 2012
How to use a beauty dish
A beauty dish creates a nice semi-soft, semi-directional light that has a slightly more defined shadow edge than a soft box or umbrella and the directionality and focus of a reflector. The sweet spot for a beauty dish is about 1 to 1 1/2 times the diameter of the dish.
 For this shot of Lauren Jennings I set up the beauty about a foot and a half away from her on camera right and slightly higher than eye level to give a nice paramount (butterfly) type lighting pattern. The beauty dish was metered at f/11. The fill light was a 40x40 soft box 2-3 feet away and was camera left and just slightly below eye level to fill in the shadows and give a nice soft overall light. It was metered just under the main light. The back light was a bare reflector metered the same as the main and placed low to give a nice glow on the hair.
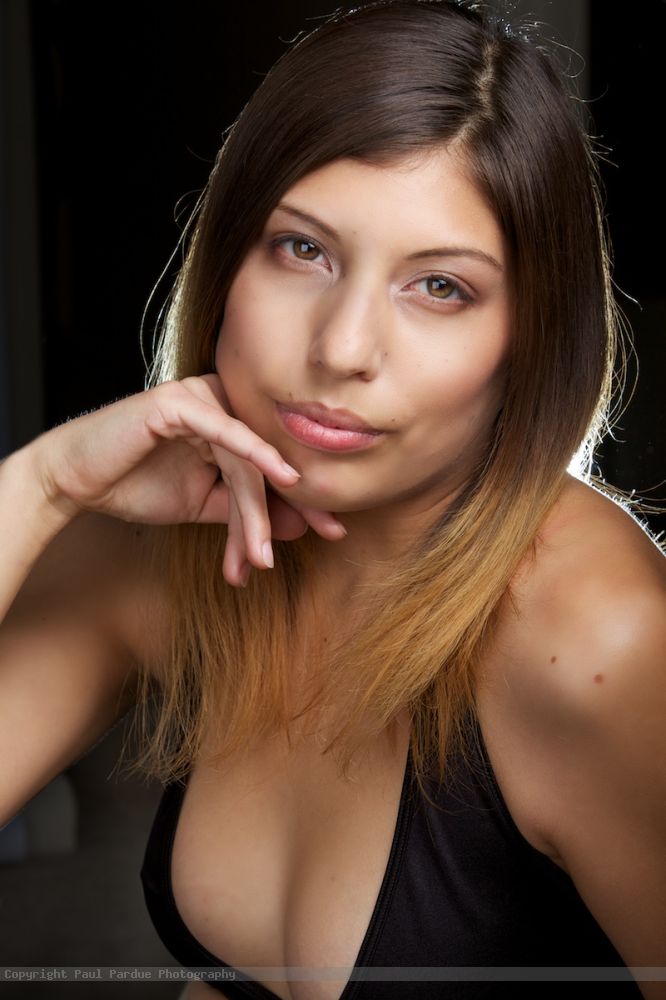
 This shot uses largely the same type of set up, with the dish and soft box being further away. By setting the dish further back the light is harsher and more directional producing a more distinctive shadow. The beauty dish is lower and further right creating a loop lighting pattern, with the soft box being closer to on axis to give an even light. The hair light is bare reflector camera right and up high, with a red gel to compliment the color of the bra. The main light is metered at f/8, the fill around 1/2 to a full stop under, and the hair light at about the same and feathered slightly.
Wednesday, February 22, 2012
Veronica
Tuesday, January 10, 2012
fashion and beauty photography
I've compiled a slideshow of some of my fashion and beauty photography on youtube. Please enjoy. :)
Subscribe to:
Comments (Atom)